Gateway configuration
Linking Gateways to Your iNELS Cloud Account
After logging in to your iNELS Cloud account, the next step is to link your Wireless Smart Gateways or BUS Central Units to the platform. This linkage establishes communication between your physical devices and the cloud-based management system, enabling seamless control and monitoring capabilities from anywhere with internet access.
INELS Wireless System in Cloud
Adding and Configuring Wireless Gateway via iNELS App
The eLAN RF 103 communication gateway requires configuration using INELS application, ensuring seamless setup and management.
To effortlessly set up and configure your eLAN RF 103/ RF Touch 2 communication gateway, simply follow these quick steps using the iNELS mobile app:
Android: https://play.google.com/store/apps/details?id=cz.elkoep.inelssmarthome&hl=en
iOS:https://apps.apple.com/cz/app/inels/id1598517469?l=en
Register an Account: Begin by signing up for an iNELS account either on the inels.cloud website or directly through the mobile application.
Connect the Gateway: Ensure your gateway (e.g., eLAN 103/ RFT2) is connected to your local network. Navigate to Account > Gateway Administration > Add New Gateway, and input the gateway credentials.
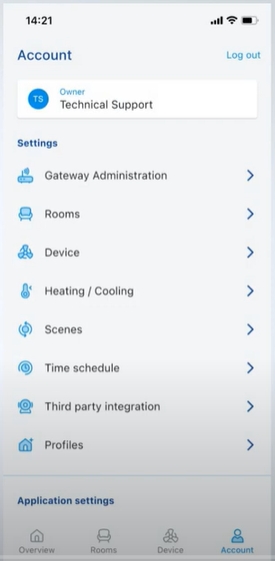
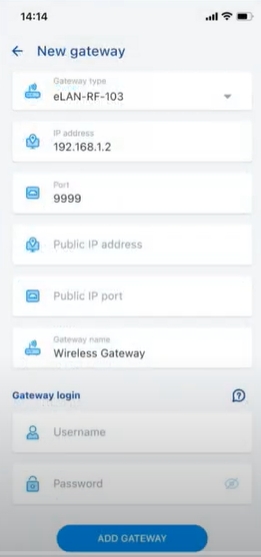
Pairing with Cloud Account: Once added, the gateway will automatically pair with your cloud account upon detection.
Configuration: Save the gateway settings and proceed to configure your system according to your preferences.
Adding RF Actors: Utilize the "Add New Device" feature in the app to add RF actors. Provide a name and assign the exact RF address along with the actor type as per the product documentation.
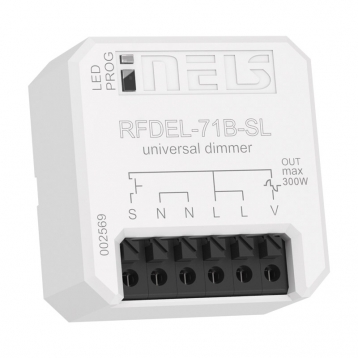
Assign Devices to Rooms: Create rooms within the app and assign the devices you've added to them for better organization and control.
Restart Gateway: After completing the configuration, restart the configured gateway. This action will ensure that the configuration settings are synchronized and sent to the cloud.
Remote Control: Enjoy remote control access to your configured devices via both the mobile application and the web interface on inels.cloud.
Automatic Cloud Synchronization: All configurations made through the application are automatically copied to the inels.cloud website, providing centralized access and management.
For the RF system to function correctly through the cloud, it is imperative that all elements intended for use be assigned to a room.
Elements must be assigned to a room to be displayed on the inels.cloud website. Failure to assign elements to a room will result in them being omitted from the website interface and thus inaccessible for configuration.
INELS Bus system in Cloud
Setting Up Control and Monitoring for iNELS Cloud
It is possible to control and monitor all the bus units in iNELS cloud. There are two stages to set up this function. Stage one is to do configuration in iDM3 and stage 2 is to do Configuration in iNELS cloud page.
Configuration in iDM3.
1. Unit and Parameter Selection:
Begin by accessing the iDM3 interface on your PC connected to CU.
Navigate to the Device Manager section and carefully select the units and parameters you wish to control. This step is essential for determining what gets exported to the iNELS cloud.
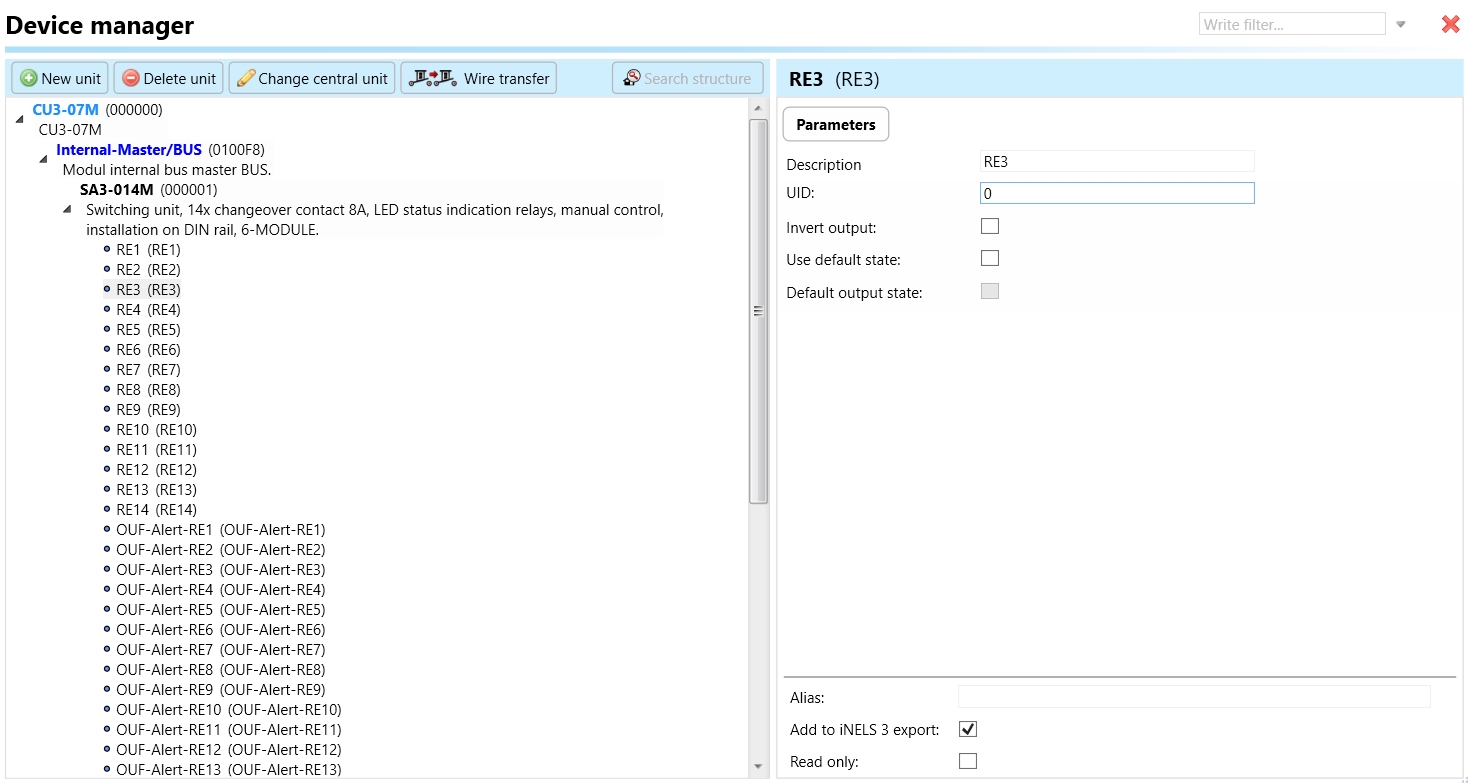
2. CU Configuration and Third-Party Settings :
After the above step, go to the CU configuration in the iDM3, and select the page for third-party settings.
Inside the third-party settings page, designate the port for cloud connection. Set the mode of operation and choose the numerical system as hexadecimal. Pay close attention to verifying and configuring all essential parameters for successful cloud export.
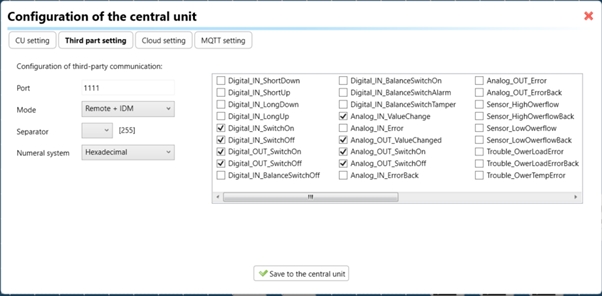
3. Cloud Settings:
Move on to the Cloud Settings section within iDM3.
Input the details of your iNELS cloud account. If you haven't created one, utilize the "New User" tab on the iNELS Cloud web page to establish a free account. (Inels Cloud - ElkoEP).
Select the mode and input the cloud account credentials. Save the project to the central unit to generate and store the export project file in the iNELS cloud account.
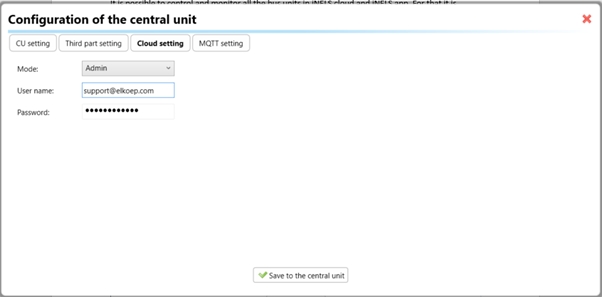
Configuration in iNELS cloud page.
1. Online Status Verification:
Once the cloud credentials and export settings in iDM3 are configured successfully, check the iNELS cloud account's Gateway section. Confirm that the Central Unit (CU) is online and that the export file has been automatically sent to the cloud under your account.

2. Device Creation in Cloud Platform:
In the cloud platform, you have to create new devices in order to control it remotely.
In the device tab, you will find the add device button, which can be used to associate export elements from IDM with the required types and icons.

After entering any name of the device, you select the icon, the MAC address of the communication gateway (in this case CU3), a specific type of device and the address of a specific function and element from the iNELS BUS system.
Note: In order to be able to use the iNELS application for communication with CU3 over the local network or the cloud, it is necessary to create a configuration on the website.
Follow these steps meticulously to ensure a seamless configuration process for controlling and monitoring all bus units through iNELS.
Last updated