Adding Devices, Creating Rooms
To ensure that a device is visible in the application, it must first be assigned to a room. This process involves creating the room within the website's interface and then associating the device with that specific room. By assigning devices to rooms, users can organize and categorize their devices effectively, making it easier to manage and control them through the application. Additionally, creating rooms allows users to customize their user experience by arranging devices according to their location or function within their home or building. Overall, assigning devices to rooms enhances the usability and accessibility of the application, providing users with a streamlined and organized interface for controlling their connected devices.
Wireless System
Rooms and devices added via the INELS mobile application on wireless Gateways are automatically integrated into the system.
This automated process simplifies setup and ensures that newly added rooms and devices are immediately accessible within the system.
BUS System
In contrast, for the BUS system, BUS units must be added manually.
This involves a manual configuration process where users input the necessary details and settings for each BUS unit.
Manual addition is necessary because of the different nature of the BUS system compared to the wireless system, requiring more detailed configuration and setup procedures.
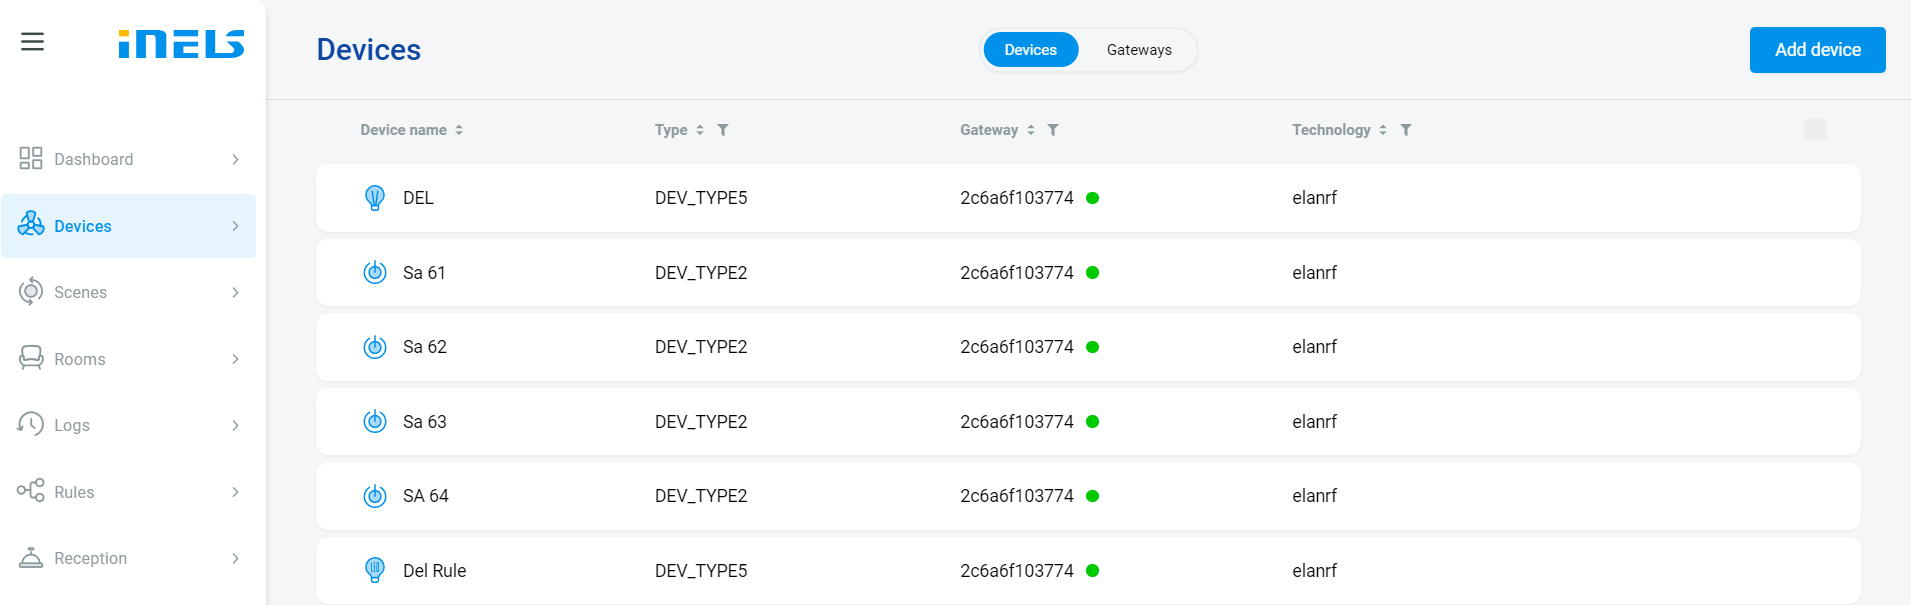
Adding Devices
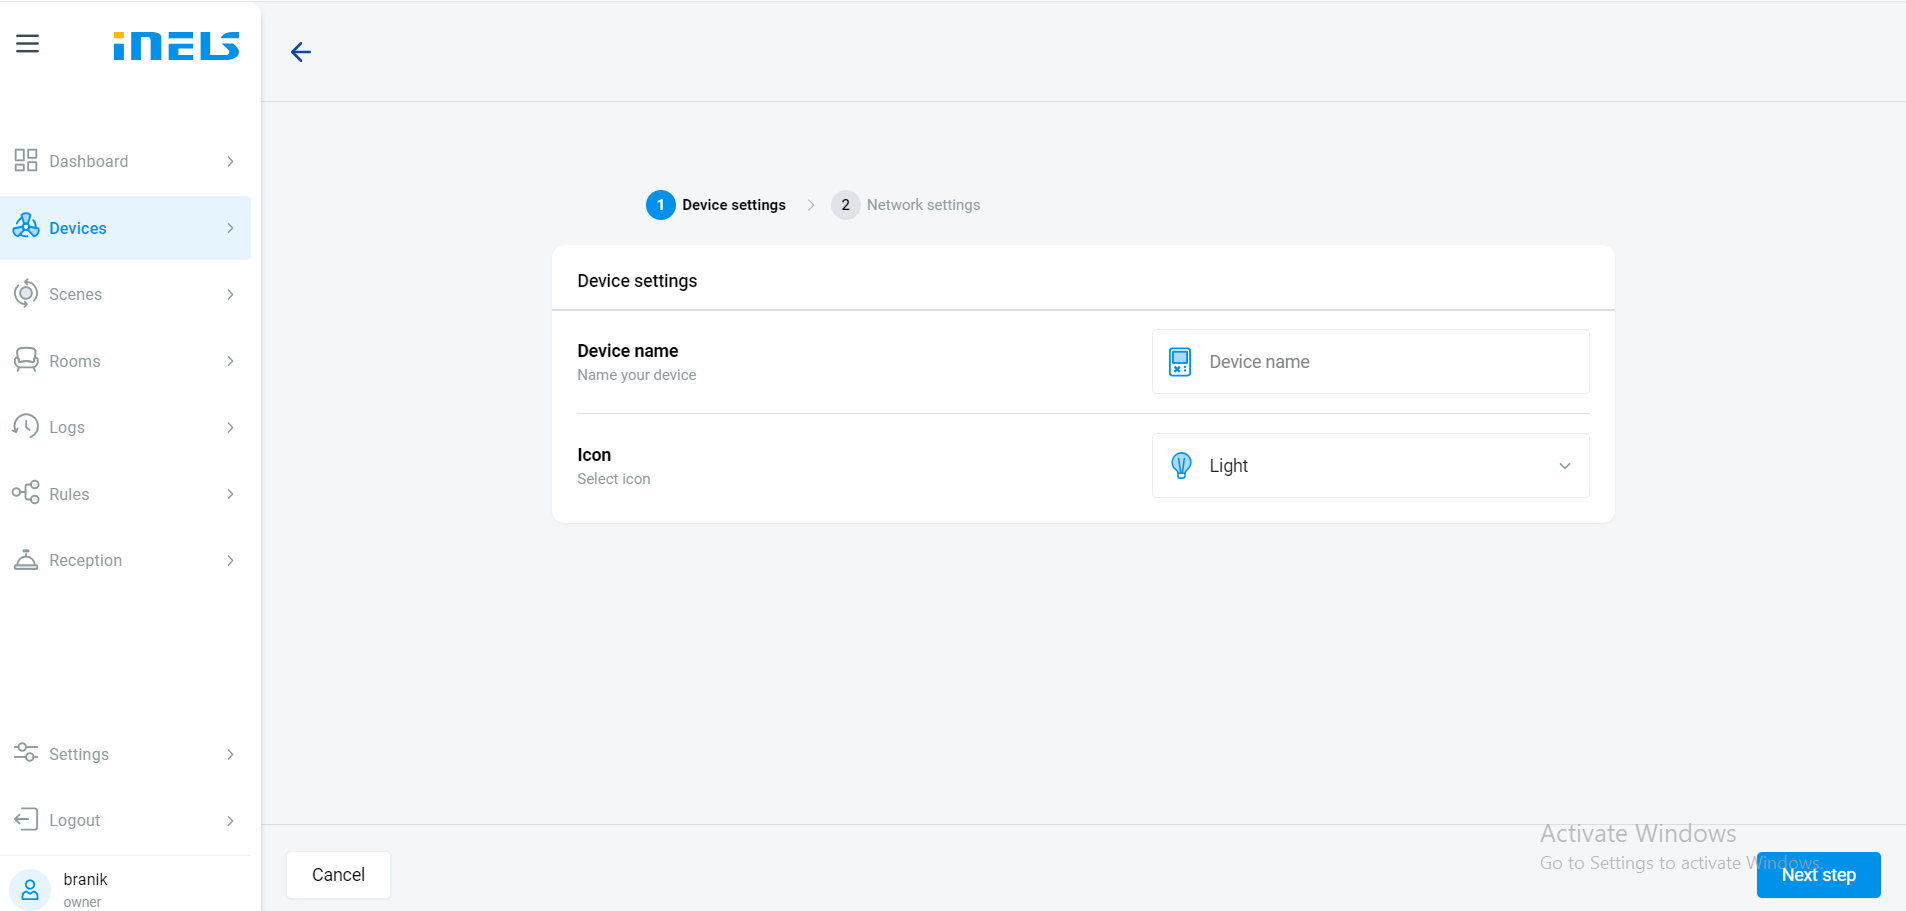
Go to the Device in the sidebar> Click the Add Device in the top right corner will navigate to the Device settings page.
Enter the Device name and Icon. After adding the device name and Icon> Click on the Next step to continue with Network settings.
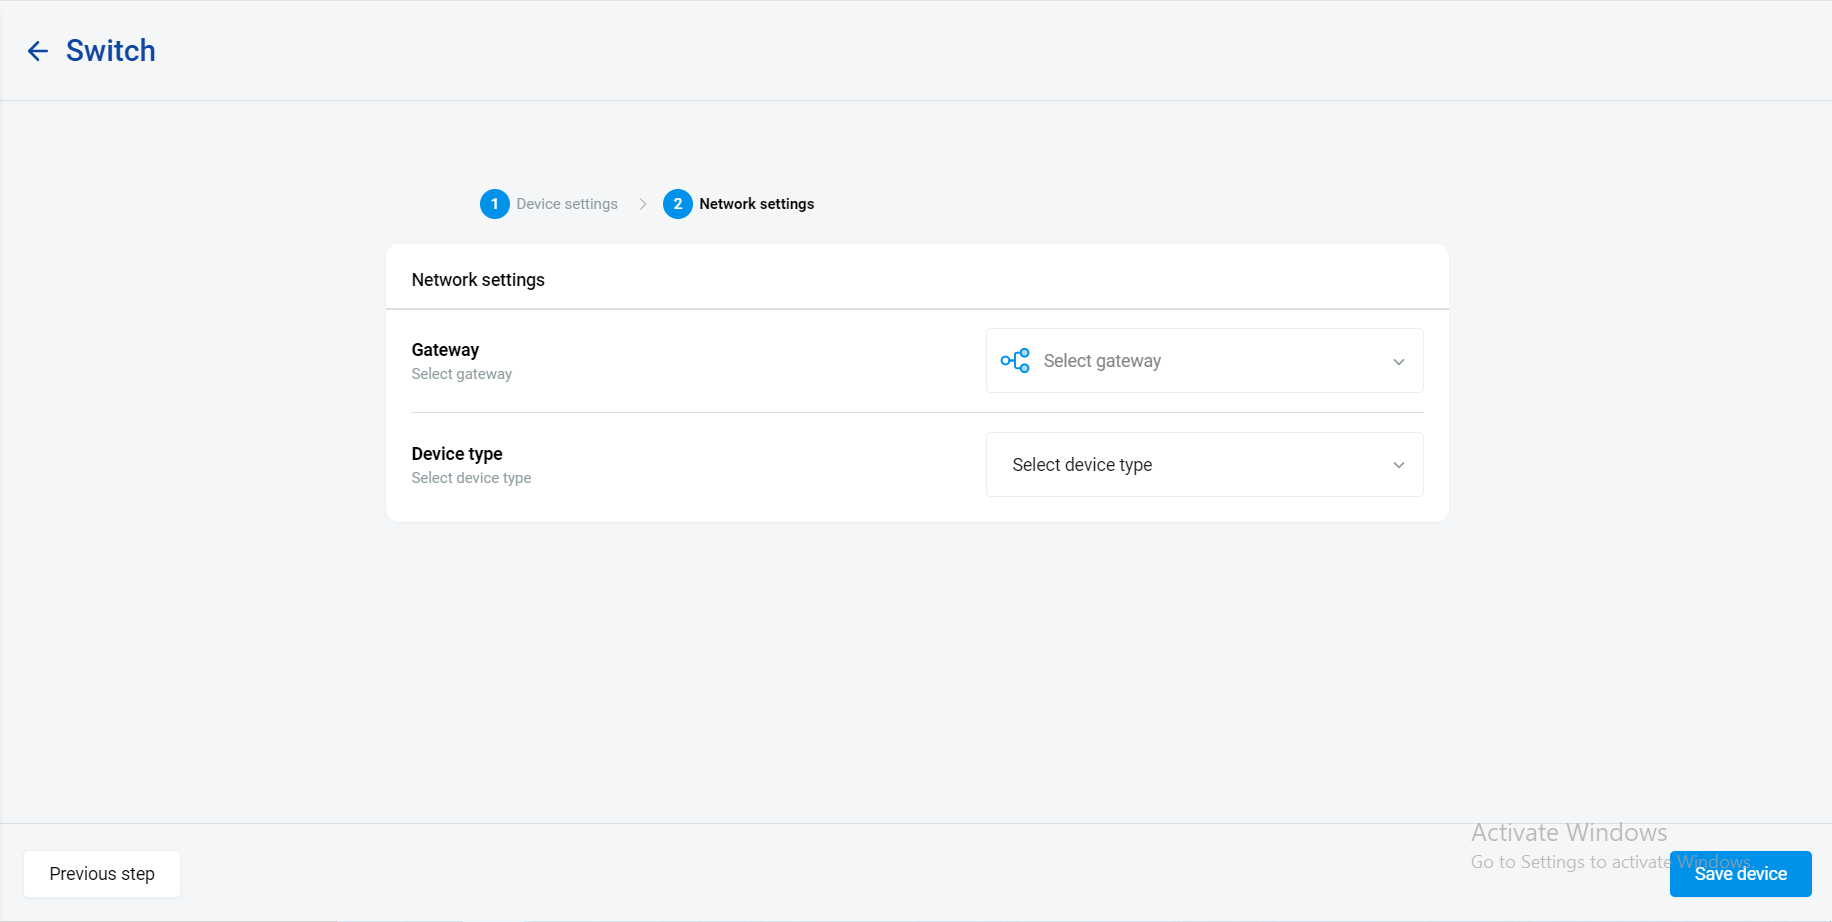
Network setting
Select the **Gateway (**Choose the Gateway using the Mac address to which the device is connected) and Device type.
Device Types
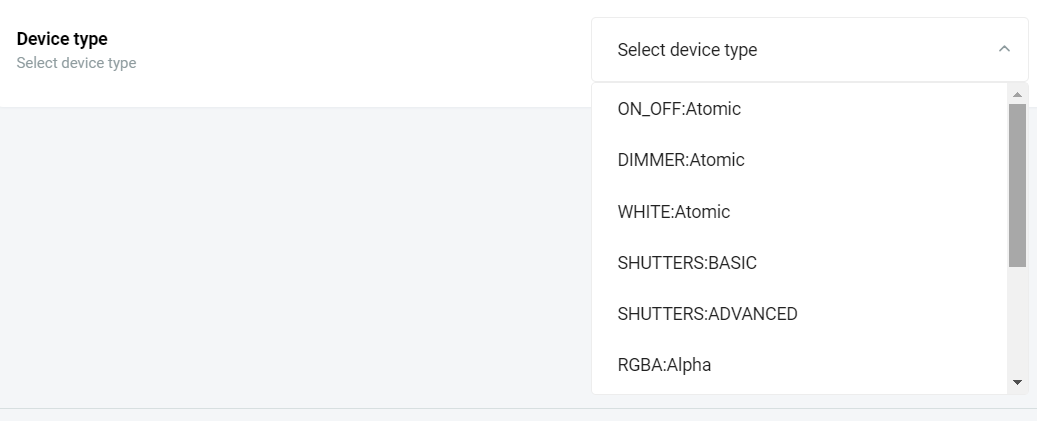
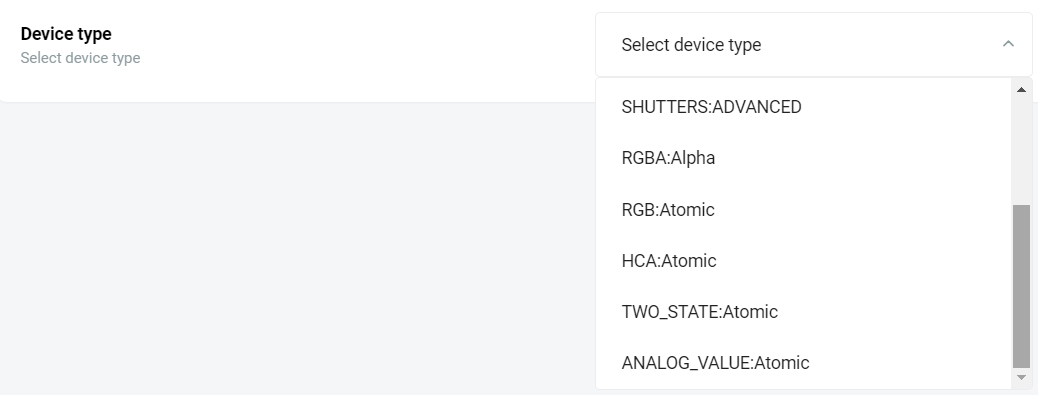
ON_OFF: Atomic

DIMMER: Atomic

White: Atomic

Shutters:Basic

Shutters: Advanced

RGBA: Alpha

RGB: Atomic

HCA: Atomic

TWO_STATE: Atomic

Analog_value: Atomic

Controll: ON_OFF: Atomic – type for relay control – states ON/OFF

DIMMER: Atomic – type for controlling dimmers – 0-100% brightness

White: Atomic – type for controlling brightness and cool/warm white color

Shutters: Basic – type for controlling blinds (up/down/stop)

Shutters: Advanced – type for controlling blinds (up/down/stop/tilt up/down and split)

RGBA: Alpha – type for controlling RGB lighting

RGB: Atomic – type for controlling RGB, individual RGB components without brightness control

HCA: Atomic – type for controlling HC4

TWO:STATE:Atomic – type for ON/OFF control (managed by a time schedule)

Analog_value: Atomic – type for displaying analog values

In the BUS system, we have one more section called Address where you need to select the specific address from IDM export.
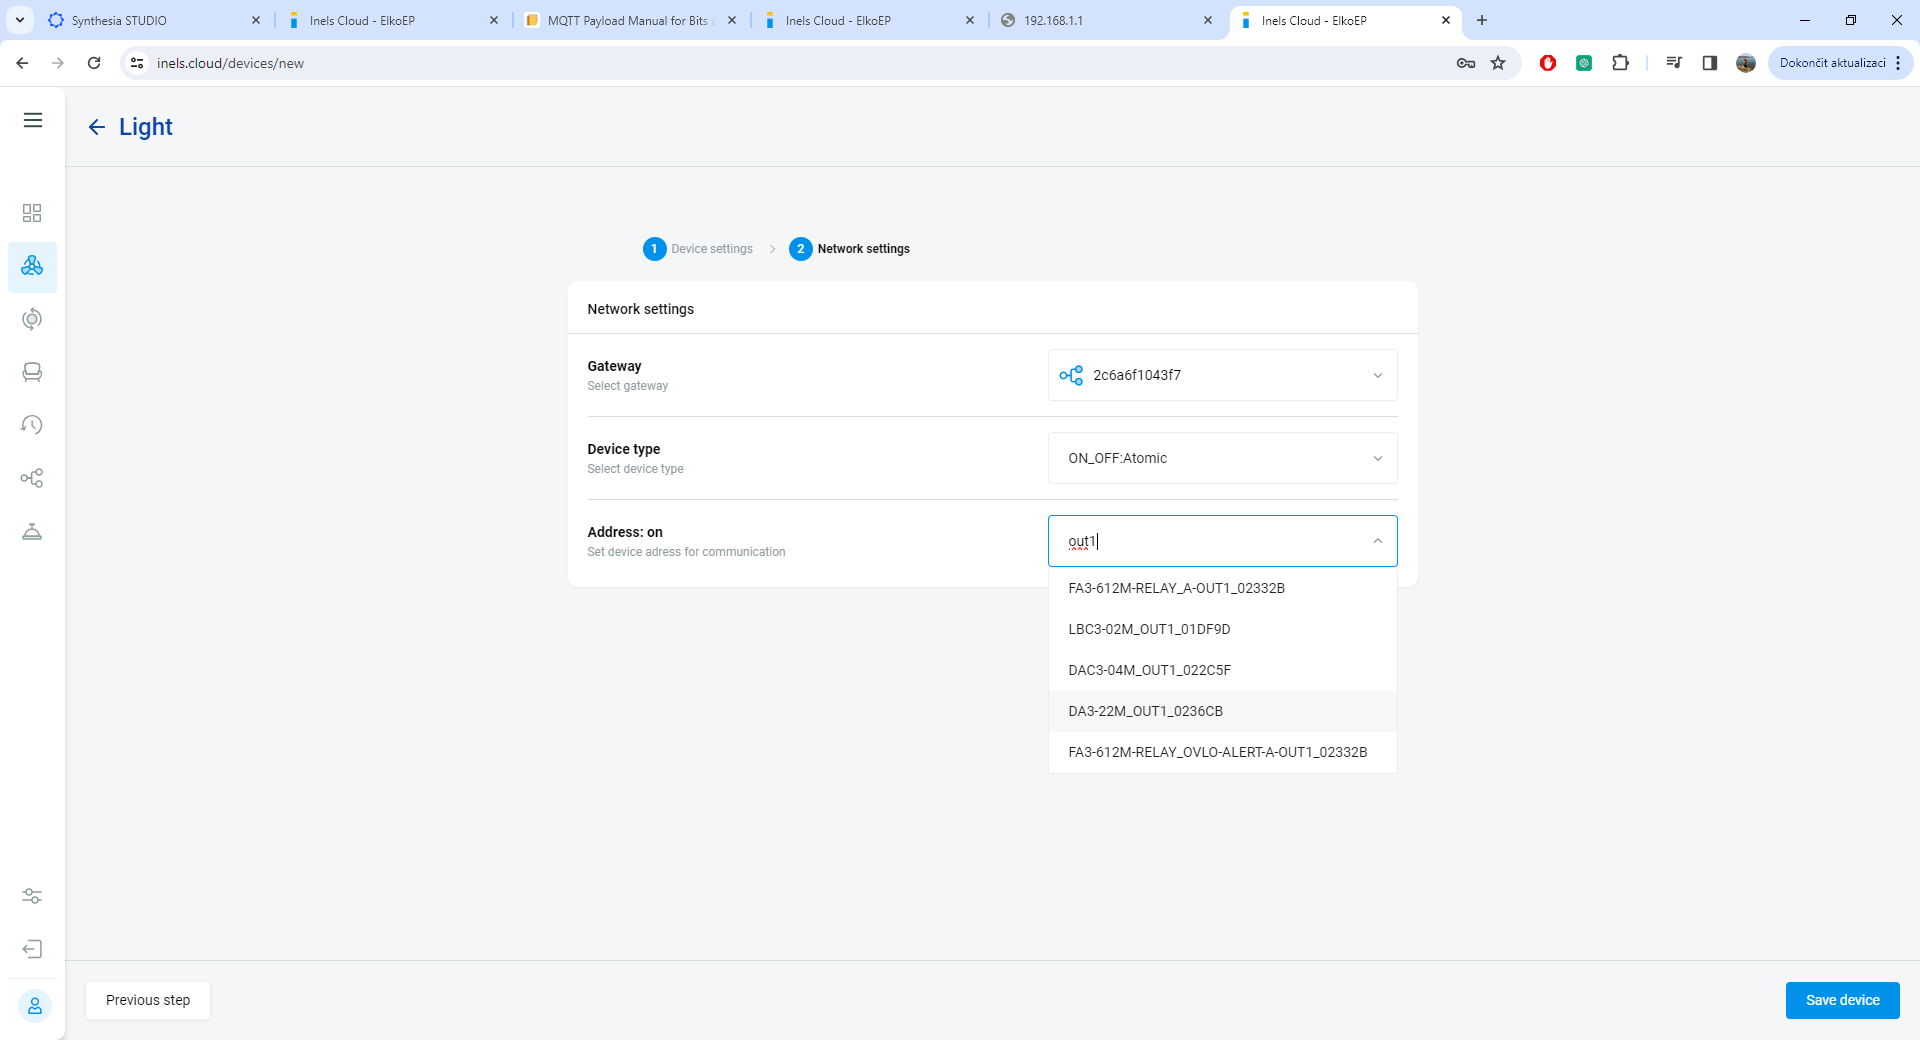
Then save device. It will appear on the device list.
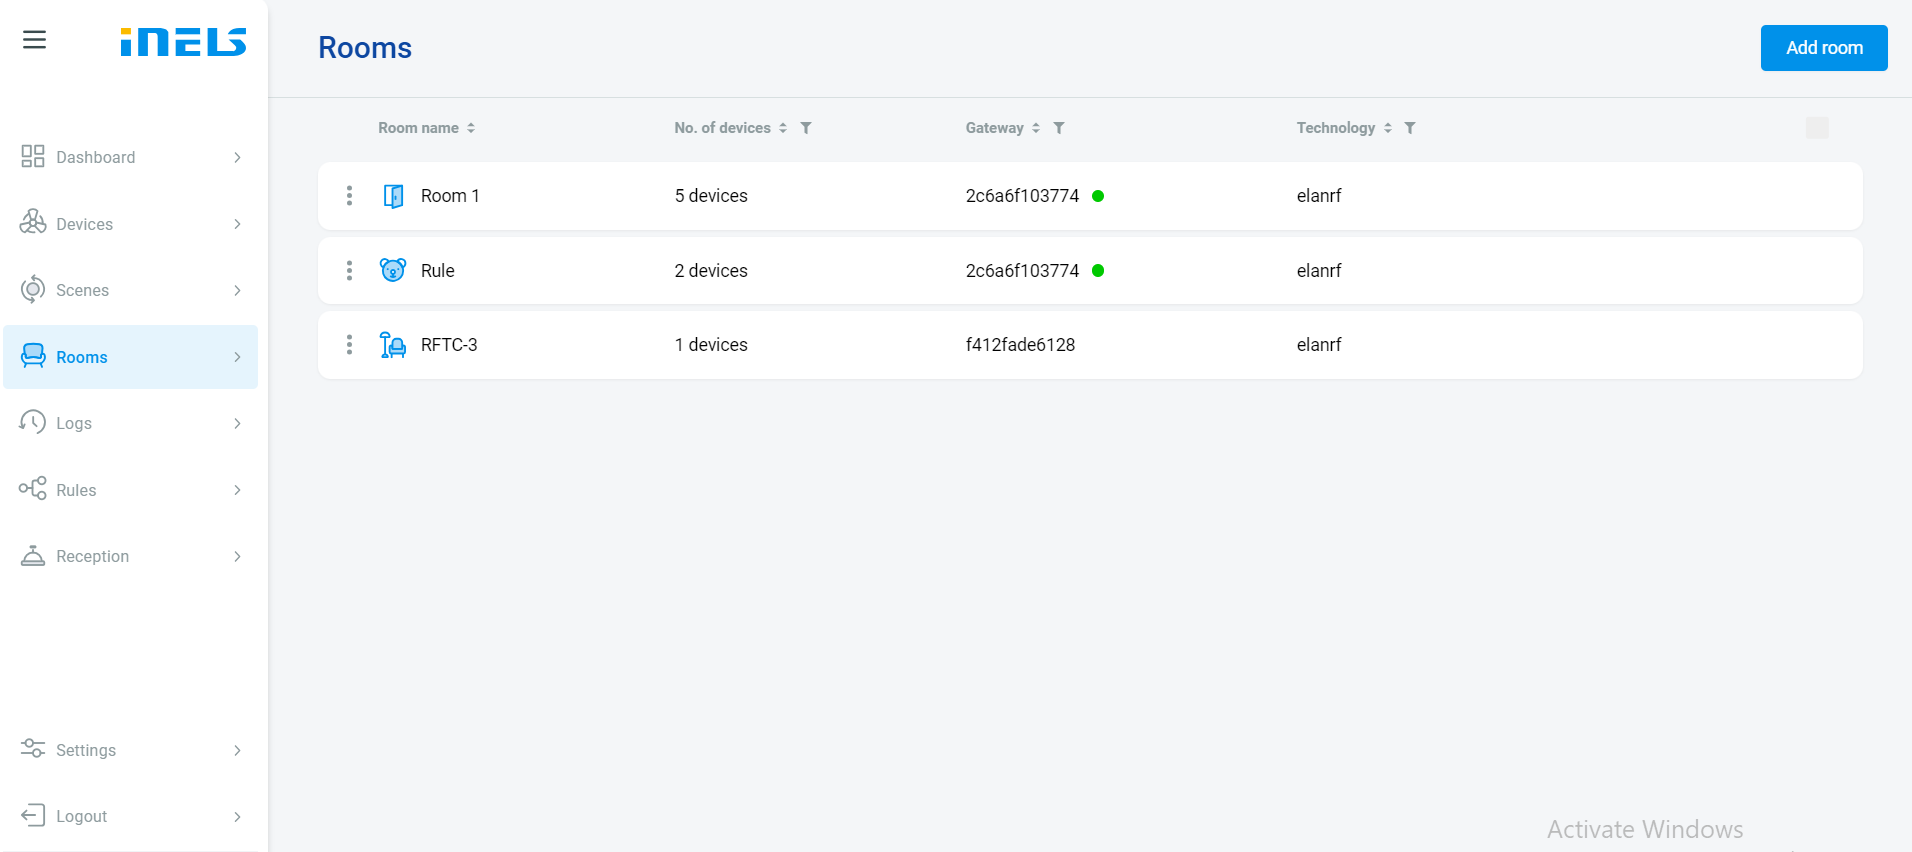
Creating Room
Open Rooms Tab: Navigate to the Rooms tab in the application interface to access a list of existing rooms.
Add New Room: If you wish to create a new room, select the "Add Room" button. This action will prompt you to enter the name of the new room.
Enter Room Details: Provide the name of the room "Room name" and choose the MAC address of the relevant communication gateway "Gateway" associated with that room. Additionally, select an appropriate Icon to represent the room.
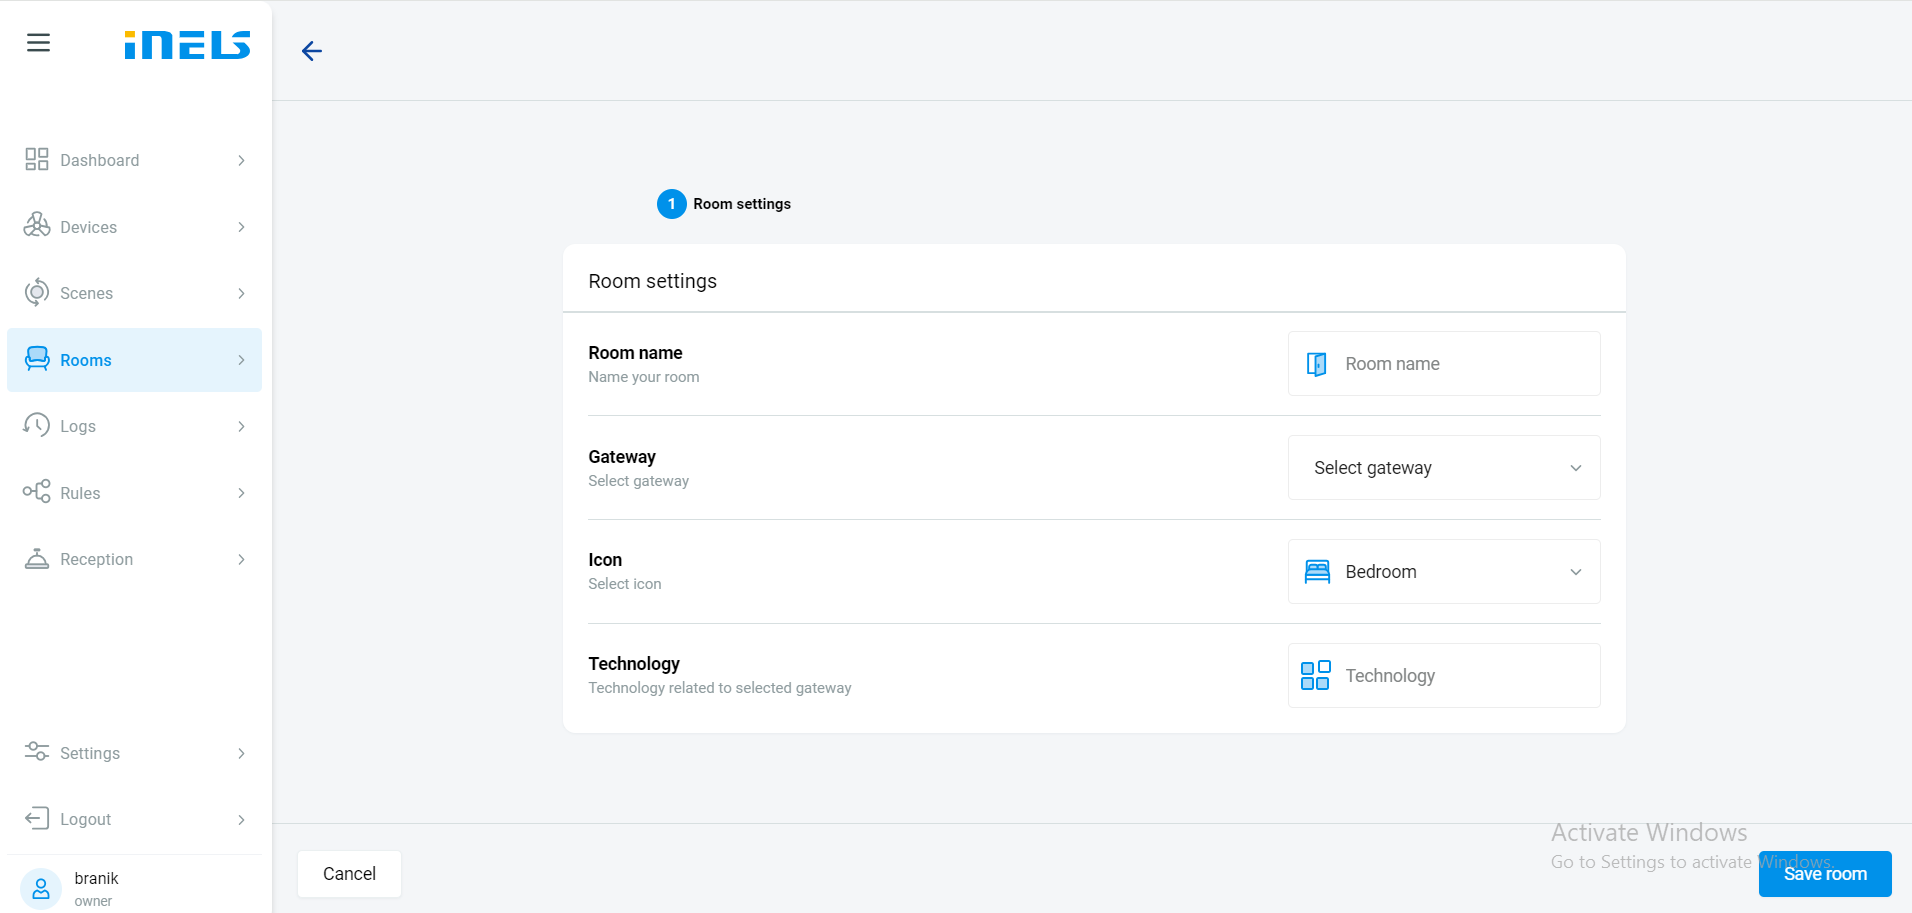
Save Room: After entering the required details, save the room configuration. The newly created room will now be listed among the available rooms.
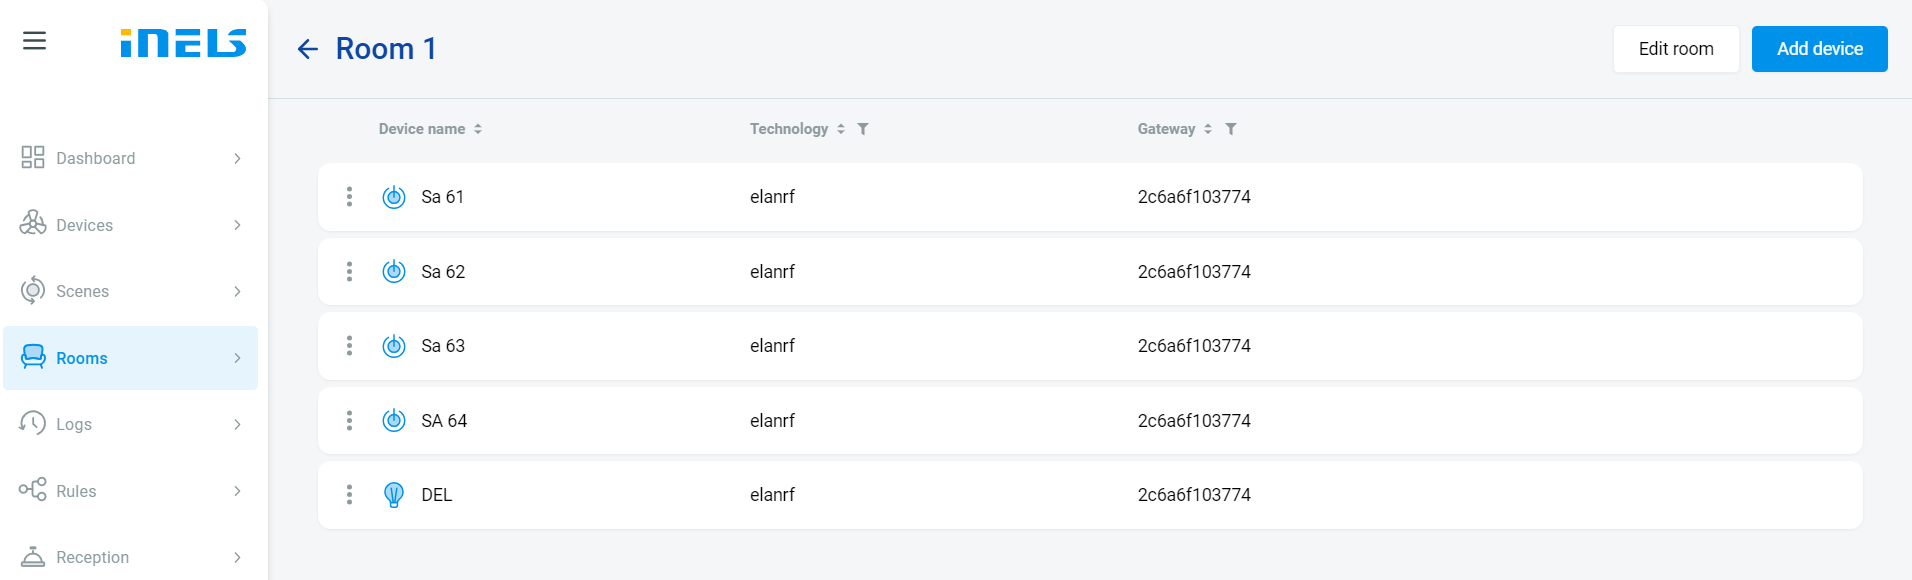
Select Room: Click on the desired room from the list to access its details and options.
Add Device: Within the selected room, locate the option to add a device. This option is typically found in the upper right corner of the room interface.
Choose Device: Upon selecting the "Add Device" function, you'll be presented with a list of created elements or devices that can be added to the room.
Select Device: From the list of available elements, choose the device you want to include in the room by tapping or selecting it.
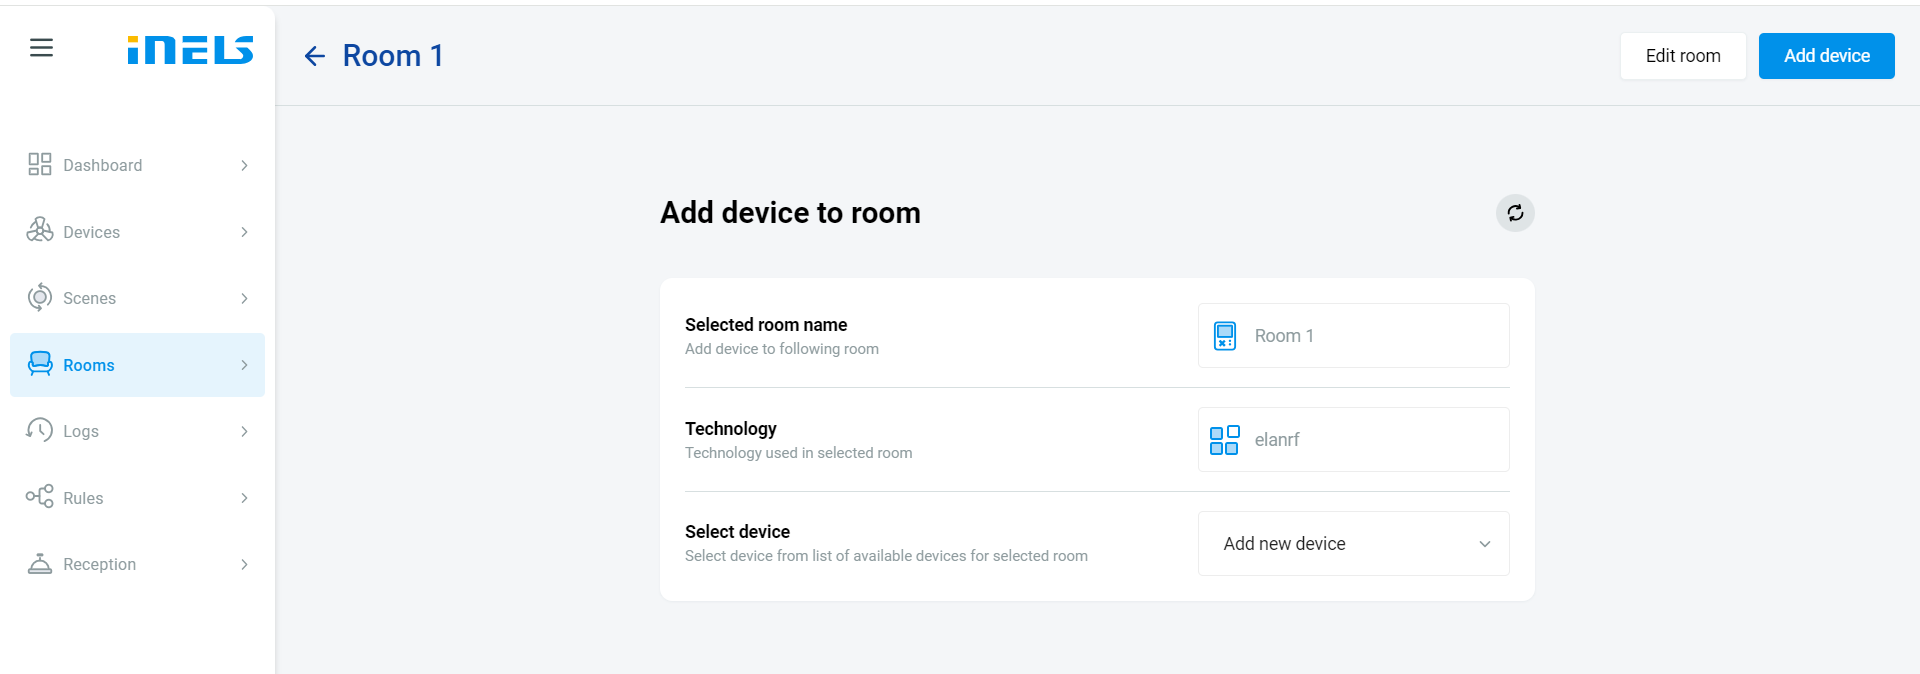
Confirmation: Once the device is selected, confirm the action. The device will now be added to the room and will be visible in the room's interface within the application.
Last updated